Automating cross platform building and continuous testing with Jenkins

In this article we will see how to manage builds for Swift projects, examplified with PackStream, through Jenkins, an open source build server. We will build it for iOS, macOS, Linux, watchOS and tvOS, and make sure it builds both through the Swift Package Manager, Cocoapods and Carthage.
Introduction & motivation
As a long-time iOS developer, I dove into server side Swift development last fall. Since this winter I’ve been involved in writing Theo, the open source Swift driver for Neo4j. Packstream, our example project, is a dependency of Theo.
For our example we will set up one of Theos dependencies, PackStream-swift. We will build it for macOS, iOS, tvOS, watchOS and Linux, with both the Swift Package Manager (SPM) on macOS and Linux, and with both CococaPods and Carthage for both iOS, tvOS and watchOS. This sounds like a lot, and it really is a lot of deployment and testing that we now get automated, but setting it up isn’t that hard.
Ensuring that for every change I do, Packstream still compiles and tests correctly on all five supported platforms, allows me to work on it with confidence. Likewise, making certain that the project keeps installing easily with either of the three main dependency managers used with Swift projects, means that I allow for flexibility for projects that depend on it, so that they get to choose how they want to integrate themselves.
Setting up the master node
To set up Jenkins, we need to have Java installed. You can download Java from Oracle.
After installing Java, we are ready to download and install Jenkins. In this tutorial we will install it on a Mac, but where you choose to host it is really secondary. It is just the master node, the build nodes will do the actual building for us.
Jenkins plugins
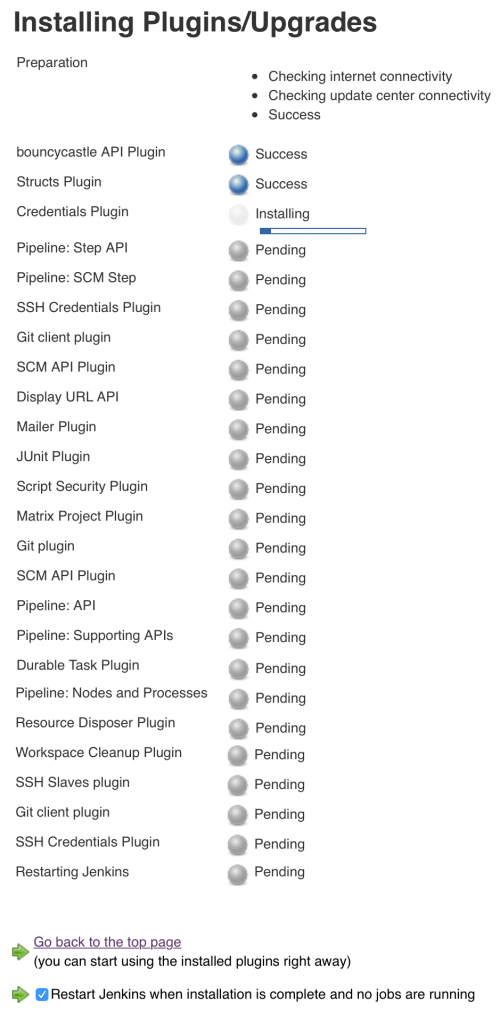
When installing Jenkins, let us install it without any Plugins. After that, we add plugins for a Git plugin, Git Client plugin, SSH Slaves plugin, Credentials plugin, SSH Credentials plugin, Job Restrictions plugin and Workspace cleanup plugin from the Manage Jenkins / Manage Plugins. With sub-dependencies, this should give us a set similar to:
Setting up slave nodes
Now that we have the master node online, let us configure the build nodes. We will configure a macOS node and an Ubuntu Linux node with Swift installed.
SSH setup
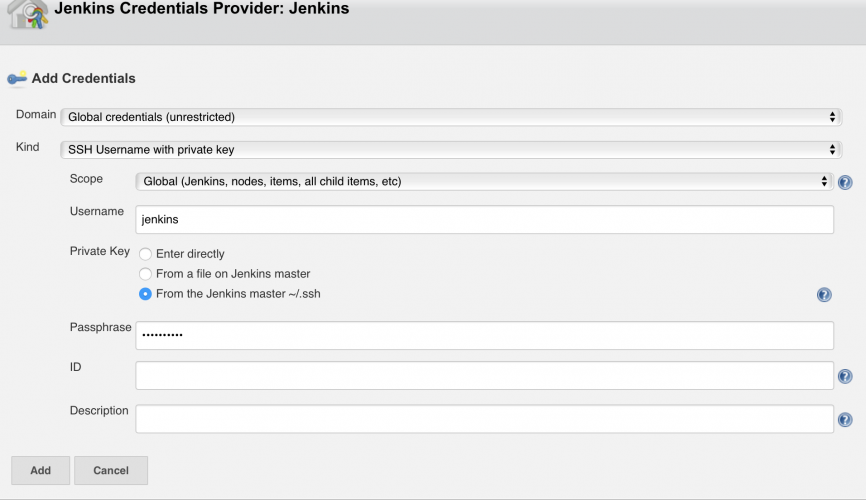
In order for Jenkins to log in from the Jenkins master node to external build nodes, we need to create an SSH key it can use to unlock the build nodes. From the terminal on the master node call “ssh-keygen -t rsa” to create our keypair if we don’t already have one. This will, in your ~/.ssh directory, create a keypair that by default is called idrsa and idrsa.pub.
macOS build node
Since we already have set up Jenkins on macOS as the master node, we can also use it as a build node for macOS. Jenkins has it set up like this by default.
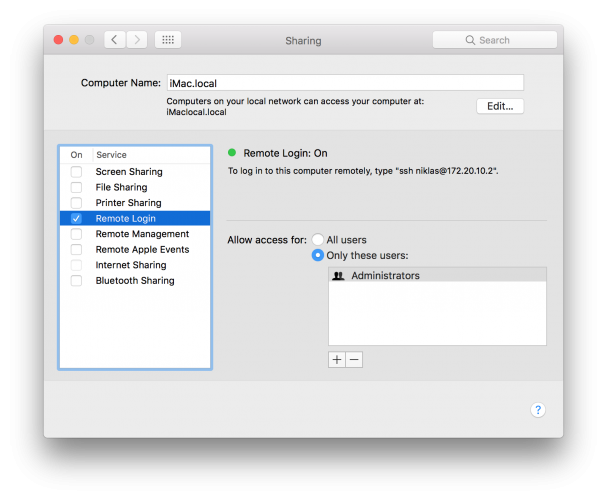
If you like, we can add other macOS nodes by installing Java on that machine, adding an account (for example called it just ‘jenkins’), allowing SSH (Remote Login) for this user, and copying the idrsa.pub file we made above to ~jenkins/.ssh/authorizedkeys
Lastly, make sure Xcode is installed on the build node, and if you haven’t already, open Xcode and allow it to install the needed tools.
Linux build node
In addition to the macOS build node, let us set up a Linux node by installing Ubuntu on a virtual machine hosted on the same Mac. You can install a virtual machine using either VMWare Fusion, Parallels or VirtualBox.
On the Ubuntu host, create a user account for Jenkins (for example called just ‘jenkins’) and make sure the Java Runtime Environment or Java Development Kit is installed. The reason we had to install Java on the Ubuntu VM is that Jenkins is written in Java, and its node management software is also written in Java. On the other hand, we don’t need to install Jenkins or any daemons on the nodes.
Ensure that sshd is enabled, and copy the idrsa.pub file we made above into to ~jenkins/.ssh/authorizedkeys. To ensure no-one else can read our SSH setup, call “chmod -R og-rwx ~jenkins/.ssh”.
Be sure to install Swift on the Ubuntu virtual machine:
Configuring the build nodes in Jenkins
With the build systems set up, let us create a node for each of them in Jenkins. Go to “Manage Jenkins”, and “Manage Nodes”. You should see an existing node called master. This is the host computer where Jenkins is installed. Let’s select “New Node” on the left hand side, and write a name for the node. I called mine iMac. Then choose Permanent Agent, tap Ok, and we’ll get to the node configuration. Add a description if you like, but what is really important is labels. This is a space separated list of what is elsewhere called tags, and is used by your different builds to select what node to use for build. For instance, we can fill out the labels field as “macOS Sierra Xcode8 Swift3 CocoaPods Carthage”. This way we can, in the macOS Swift Package Manager build, choose “macOS Swift3”, or in the CocoaPods build choose “CocoaPods”.
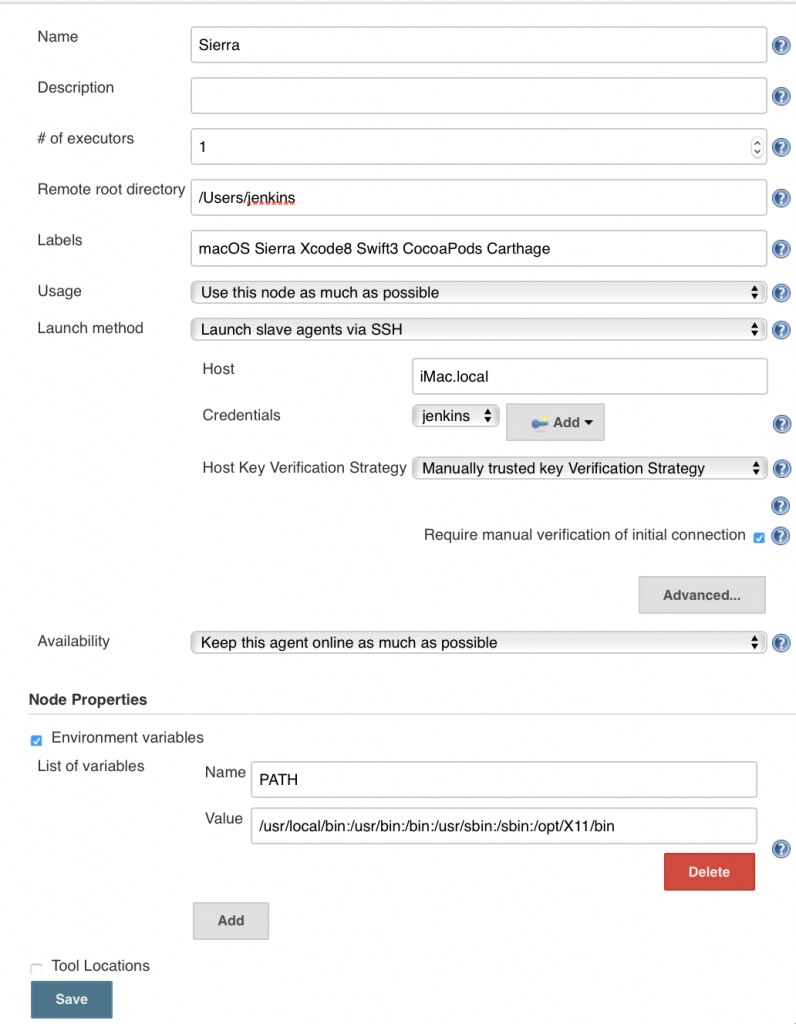
Set the number of parallel builds you want to allow (# of executors), a directory the user you log in as has access to, and for Launch Method choose “Launch Slave Agents via SSH”. Enter the hostname (i.e. iMac.local, or 192.168.0.20) and add the correct login credentials. Finally set “Host Key Verification Strategy” to “Manually trusted key Verification Strategy”, with “Require manual verification of initial connection” checked. I like to set the PATH environment variable explicitly myself, but you may be happy with the default.
Hit save, and then select the node we just created. Tap “Launch agent”, and you should see it attempting to connect. If you get unexpected errors here, go back and Configure the node. The error we expect to get, though, is “WARNING: The SSH key for this host is not currently trusted. Connections will be denied until this new key is authorised. Key exchange was not finished, connection is closed.” This is because we chose a strategy of requiring a manual, initial verification. So let’s go back to the node, and choose “Trust SSH Host Key”. There you can inspect the fingerprint, and if that looks good, press the “Yes” button to trust the SSH Host fingerprint. With that in place, choose “Launch agent” again, and the node should be ready for use.
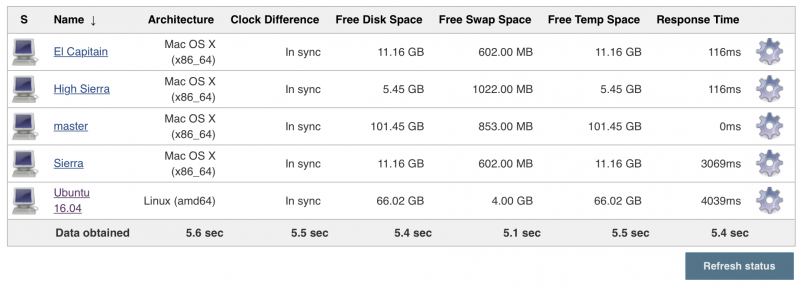
You can configure multiple nodes this way. For my setup, I have configured nodes for macOS El Capitain with Xcode 8, macOS Sierra with Xcode 8, macOS High Sierra with Xcode 9 and Ubuntu with Swift 3.
Setting up the build jobs
Now, let us set up the different build projects. For instance, let us build the PackStream-swift dependency using the Swift Package Manager (or just SPM) on macOS and Linux, build it with CocoaPods for macOS, iOS, tvOS and watchOS, and build it with Carthage for macOS, iOS, tvOS and watchOS. How nice it will be to have all this done for us after each merge to the master branch.
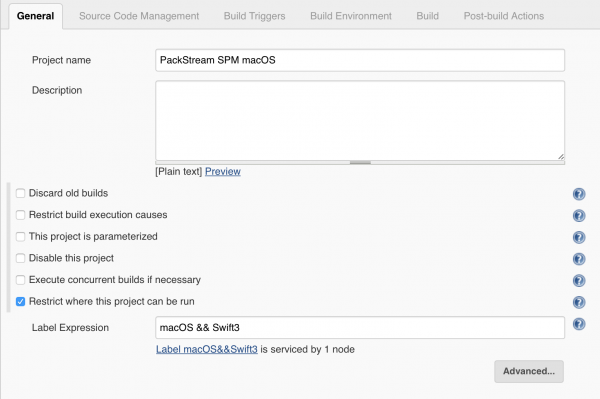
First, in the Jenkins home screen, select “New Item”, give the job a name (such as “PackStream SPM macOS”), choose “Freestyle project” and hit “OK”.

Now, to make sure it uses a macOS node, we’ll “and” the corresponding labels together under “Restrict where this project can be run”. So for both labels macOS and Swift3, type “macOS && Swift3”.
For Source Code Management let us choose git, and set the repository URL to [https://github.com/niklassaers/PackStream-Swift.git]. Since this is an open source project that the build server will only read from, we don’t need to add any credentials.

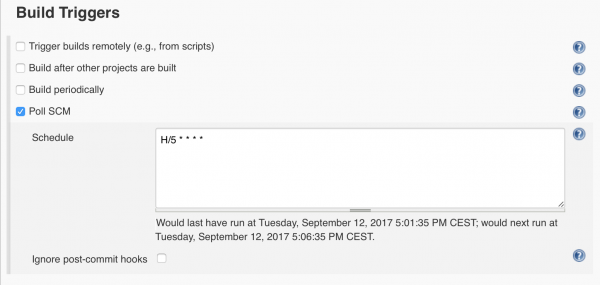
As a build trigger, choose “Poll SCM” and set the schedule for every five minutes: “H/5 * * * *”. That means that every five minutes it will check if there has been a change to the Git repo. If there has been a change, a build is triggered.
Finally, for our build, add a single build step “Execute shell”. And the command is super-simple:
swift test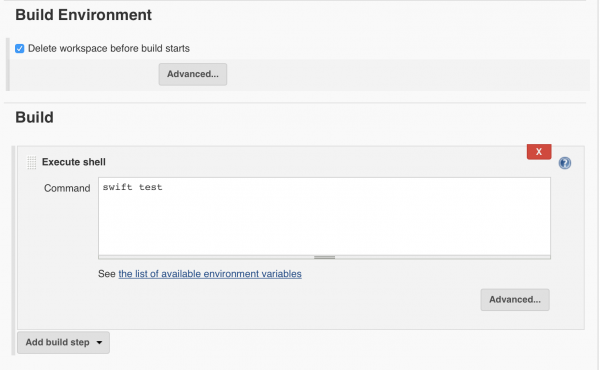
That’s it. We have now set up a job to every five minutes check if the code has changed, and if it has, build it using the SPM on macOS running Swift 3. To set it up on Linux, do the exact same thing, but choose a different name, “PackStream SPM Linux”, set the label to “Ubuntu Swift3”, and that’s it.
Cocoapods
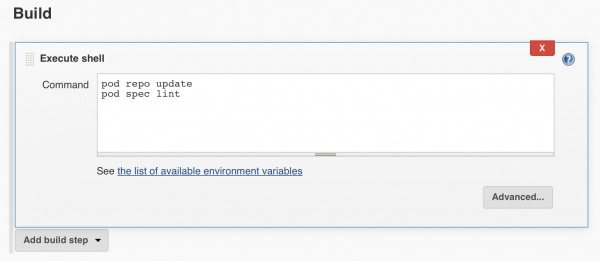
To set up CocoaPods, make sure to have it installed on your Xcode build node. To build for both macOS, iOS, watchOS, and tvOS, we will use the Podspec in the PackStream-swift repo. Let us do the same as we did for the “PackStream SPM macOS” job, except set the label to “CocoaPods”, and set the shell command to
pod repo update
pod spec lint
Carthage
The most complex build script is the Carthage one. To install it, follow Carthages installation instructions. Then do the same as for “PackStream SPM macOS” (you can just duplicate it), add the label Carthage, and replace the script with the following script:
echo "github \"niklassaers/PackStream-swift\"" > Cartfile
carthage bootstrap
cd Carthage/Checkouts/PackStream-swift
swift package generate-xcodeproj
cd -
carthage build
The reason for this longer script is that PackStream-swift doesn’t include an xcodeproj, but relies on the SPM to create it. So what this script does is define the needed module in a Cartfile, set up Carthage, then generate PackStream.xcodeproj, and finally build it for macOS, iOS, watchOS and tvOS.
And there you have it, a build server set up to build using three build systems and five target systems.

Signing off
You can run a large, diverse setup of build nodes on a single Mac with virtual machines. For my part, I run my setup on equipment I already had set up in my home. The setup is very scalable and very dynamic.
Having this build setup has made me aware of build errors in dependencies that I would not be aware of otherwise, it has caught errors in code I’ve pushed where the changes broke on Linux, where new minor Swift versions gave new warnings, and has even made me aware that I had forgot to run updates on my wife’s computer for a while. I can run my tests on my current build environment, and still know exactly what to expect with upcoming macOS, Xcode or swift versions. So now I’m really free to work on the code, and have Jenkins tell me if I’m in the clear, or if I have made an error for one of the many different ways and systems my code could be built for. This means less issues reported on GitHub about stuff I should have caught, and thus I’m also not wasting other peoples time, or having them give up on my code. They can easily integrate, and spend their time with their projects.
I hope this has motivated you to set up a build server, for instance Jenkins, to build your projects. With the ease of configuring nodes and building from the command line, it’s a great tool to have running, and I hope you will get the same benefits that I have, and more.
Niklas Saers has developed for the iOS platform since 2008, and is a long time user and friend of Bugsee.